

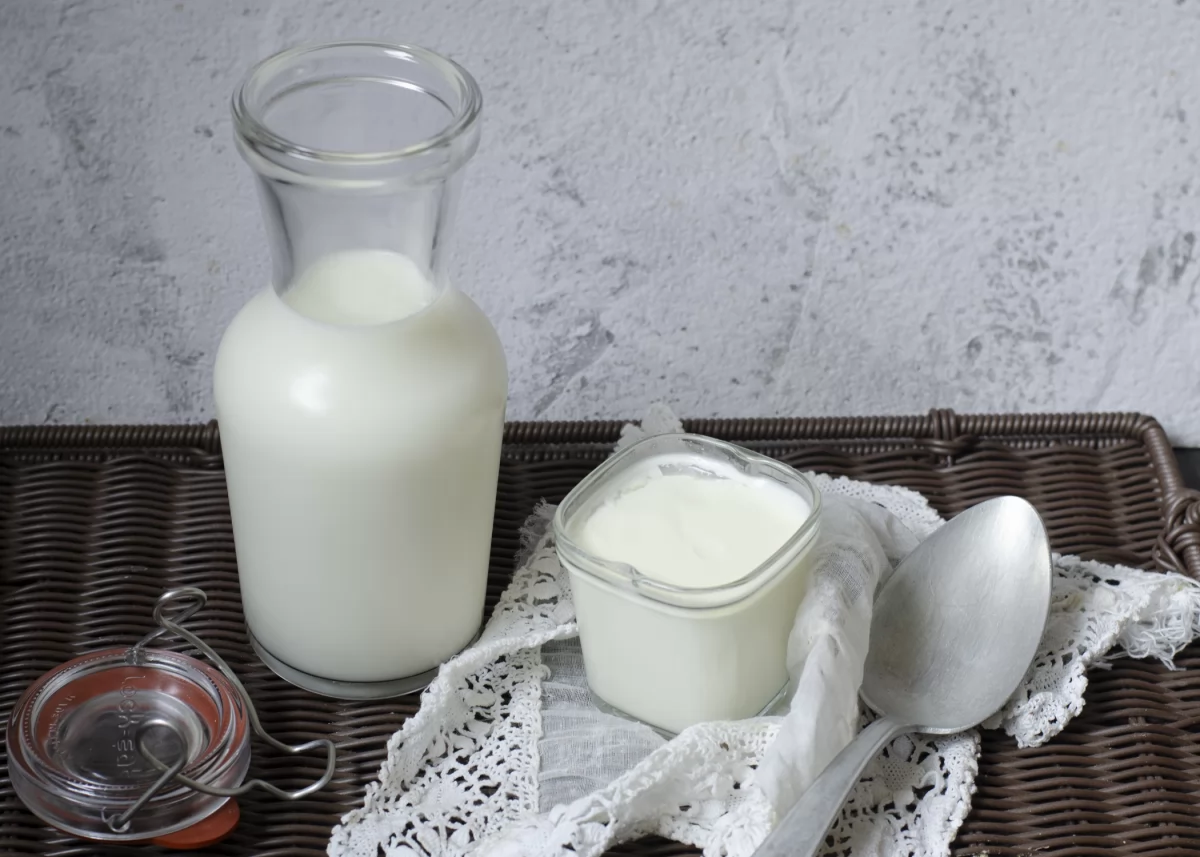
Discover the ultimate guide to making yogurt at home effortlessly with our step-by-step recipe! Learn the quickest methods to whip up delicious homemade yogurt, ensuring a smooth and creamy result every time.
Save time and enjoy the satisfaction of creating your own yogurt with our easy-to-follow instructions. Elevate your culinary skills and treat yourself to a bowl of freshly made yogurt in no time!
Before starting to make homemade yogurt, it is important to be clear about one concept: What is yogurt? Yogurt is just fermented milk.
through a process called lactic fermentation that takes place by the action of bacteria Lactobacillus delbrueckii subsp. bulgaricus and Streptococcus thermophilus.
The process is simple and, simply, with three steps we can make yogurt; heat milk, add the culture or bacteria and incubate the mixture.

What do we need to make yogurt at home?
To make yogurt at home we only need three things: milk, a culture and a warm place for fermentation to take place.
The milk. What is the best milk for making yogurt?
Although the usual thing is to make yogurt with cow’s milk, it is also possible to use goat’s milk or sheep’s milk. We can use both whole milk and skimmed milk, add cream, powdered milk or make a mixture with the aforementioned dairy products.
It is best to make yogurt with fresh pasteurized milk, which is the one that is sold refrigerated, although we can also make yogurt with ultra-pasteurized or UHT milk, which is the milk that is sold without refrigeration. The so-called vegetable milks are not suitable for making yogurt itself.
Is there a difference in the result obtained depending on the milk we use? Absolutely yes. As in any preparation, the ingredients that we use to make our homemade yogurt are decisive and, in this case, the type and quality of the milk will affect the result.
Also, depending on the type of milk we use, the final texture of the yogurt can be more or less consistent. One option to add more consistency to our homemade yogurts is to add powdered milk to the liquid milk, before fermentation.
The crop. What culture do we need to make homemade yogurt?
In addition to the milk, as we explained in the previous section, we need a culture of bacteria that will be responsible for carrying out the fermentation of the milk.
We can buy this culture in herbalists or in many online stores where we can easily find freeze-dried cultures in sachets, specifically for making homemade yogurt.
However, the simplest is to use another yogurt as a culture. He yogurt used as a culture can be a natural commercial yogurt or a homemade yogurt.
Does the chosen yogurt culture affect the final result? As was the case with milk, the culture used will also have an impact on the final result.
The optimal thing is to choose our own cultures according to our preferences, and reserve one of the yoghurts prepared with this culture as a culture for subsequent preparations.
Depending on the type of crop chosen, we can repeat the process up to 10 times. Using a commercial yogurt as a culture, we can also repeat the process of reserving a homemade yogurt as a culture for the next preparation, with the exception that we cannot repeat the process as many times, since the strength of this culture is less.
Also, by using our own starter cultures, we will have more control over the ingredients in our yogurt than if we used a commercial yogurt.
Regarding the amount of culture needed to make homemade yoghurts, if we opt for a specific commercial culture to make yoghurts, we will only need to follow the manufacturer’s instructions.
If we choose to use a commercial or homemade yogurt as a culture, we will need it to represent 10% of the weight of the milk, which means approximately one yogurt for every liter of milk.
The fermentation of homemade yogurt with and without a yogurt maker
For fermentation to take place, the only thing that we need is a warm place in which to maintain the right temperature during the fermentation process. This is precisely what the yogurt maker does, although we can also achieve it with other homemade alternatives that also work perfectly. We must not forget that yogurt has been made for many years, long before there were even yogurt makers.
-
- Homemade yogurt in yogurt maker: if we make yoghurts regularly, this may be the most comfortable way and with which we will obtain the best results, since fermentation takes place in the yoghurt maker at a constant temperature for the desired time. With this method, we will have our homemade yogurts ready between 6 and 8 hours depending on the type of milk used and the strength of the ferment.
-
- Homemade yogurt in the oven: If we do not have a yogurt maker, this is a good option since it also allows us to make many yogurts at the same time. To make homemade yogurt in the oven, once we have our mixture of milk with the culture, we pour it into the containers where we will make the yogurt, which must be made of glass, earthenware or clay. We heat the oven to 60 °C and leave them inside for an hour, at that temperature. Next, we turn off the oven and, without opening the door, we leave the yoghurts inside for about 12 hours.
-
- Homemade yogurt with other methods: Another way to make homemade yogurt is to keep the residual heat from the initial mixture. To do this, we can store the jars with the mixture of milk and culture still warm in an isothermal container such as a freezer bag or a beach cooler. We can even use a towel or thermal blanket to insulate them and prevent them from losing heat and let them ferment in a warm place, such as near a radiator, for at least 8 hours. Whether we opt for this method or the previous one in the oven, it is convenient to control the process and adjust it until the desired result is achieved.
The milk, the culture chosen, the fermentation temperature or the time will have an impact on the final result of our homemade yoghurts, therefore, once again, we can give approximate times for this type of preparation but never exact, since these They will depend on the particular conditions of each house.
How long does homemade natural yogurt keep?
The ideal is consume homemade yogurts within a week and, after this, make yogurt again. Once made, we will store the homemade yogurts in the fridge, where they will gain consistency and where the fermentation will slow down.
However, it must be borne in mind that fermentation in the fridge does not stop, but continues to take place, although much more slowly. This causes that, with the passage of time, the yogurts gradually become more and more acidic.
After having reviewed the basics for making homemade yogurt, let’s go with the recipe.
In this recipe, we have chosen to use a yoghurt maker and a homemade yoghurt as ferment, which had been previously made with a specific yoghurt ferment, although this does not alter the process indicated below.
It is possible to use a natural yogurt purchased and follow the process described in the following lines in an identical way.

-
- Preparation time: 15 minutes
-
- cooking time: 8 hours
-
- total time: 8 hours and 15 minutes
-
- rations: 6 units
-
- Category: dessert
-
- type of cuisine: international
-
- Calories per serving (kcal):125
Ingredients for homemade natural yogurt for 6 people
-
- 1 liter of whole cow’s milk
-
- 1 natural yogurt
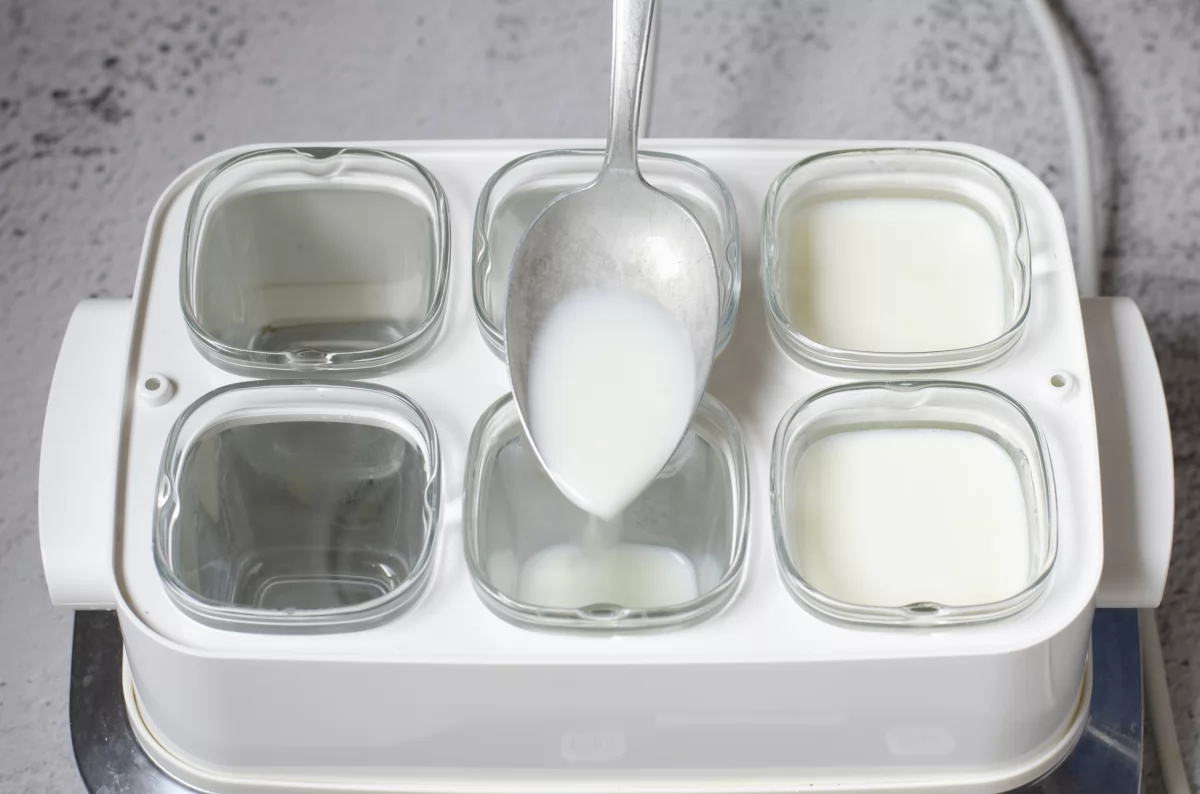
We prepare the ingredients of the recipe. We put 1 liter of milk in a saucepan. We bring it closer to the fire and let it reach 40 ºC. If we have a kitchen thermometer, it is better to use it to be accurate with this temperature. If we do not have a thermometer, it will help us to know for reference that this can be the temperature of the water in a hot shower.
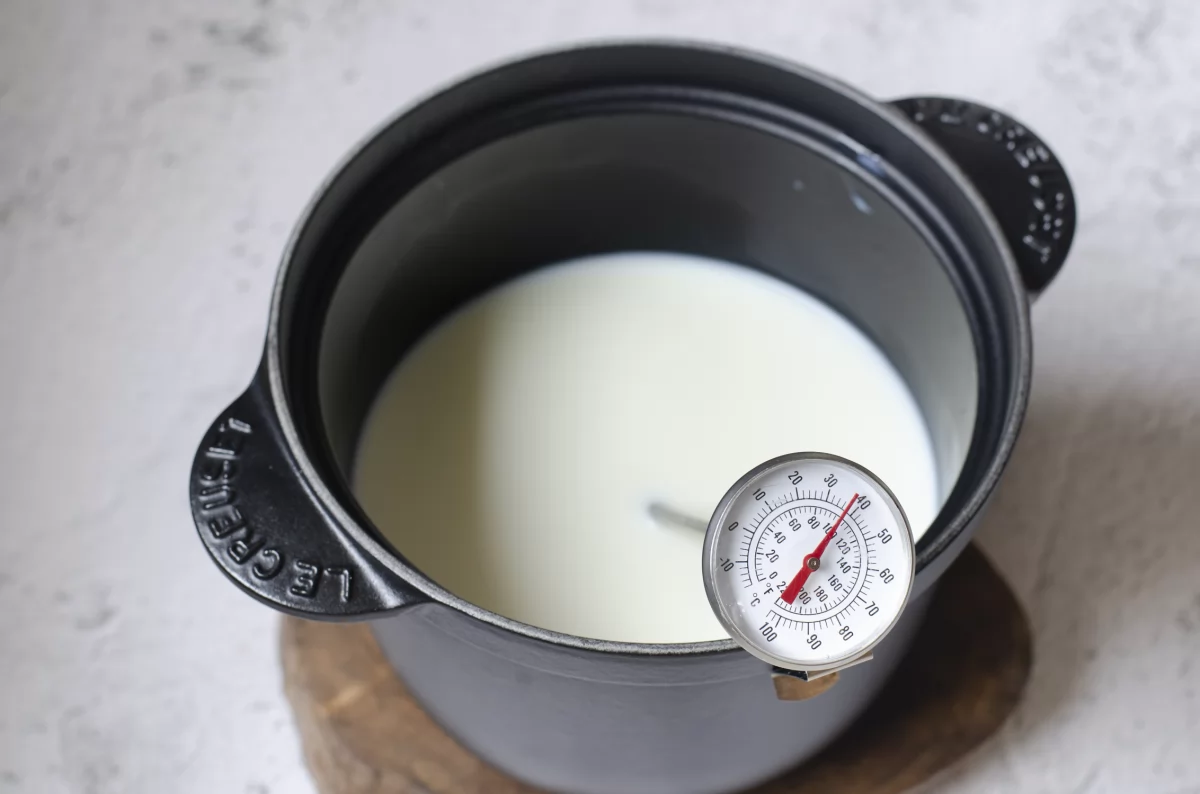
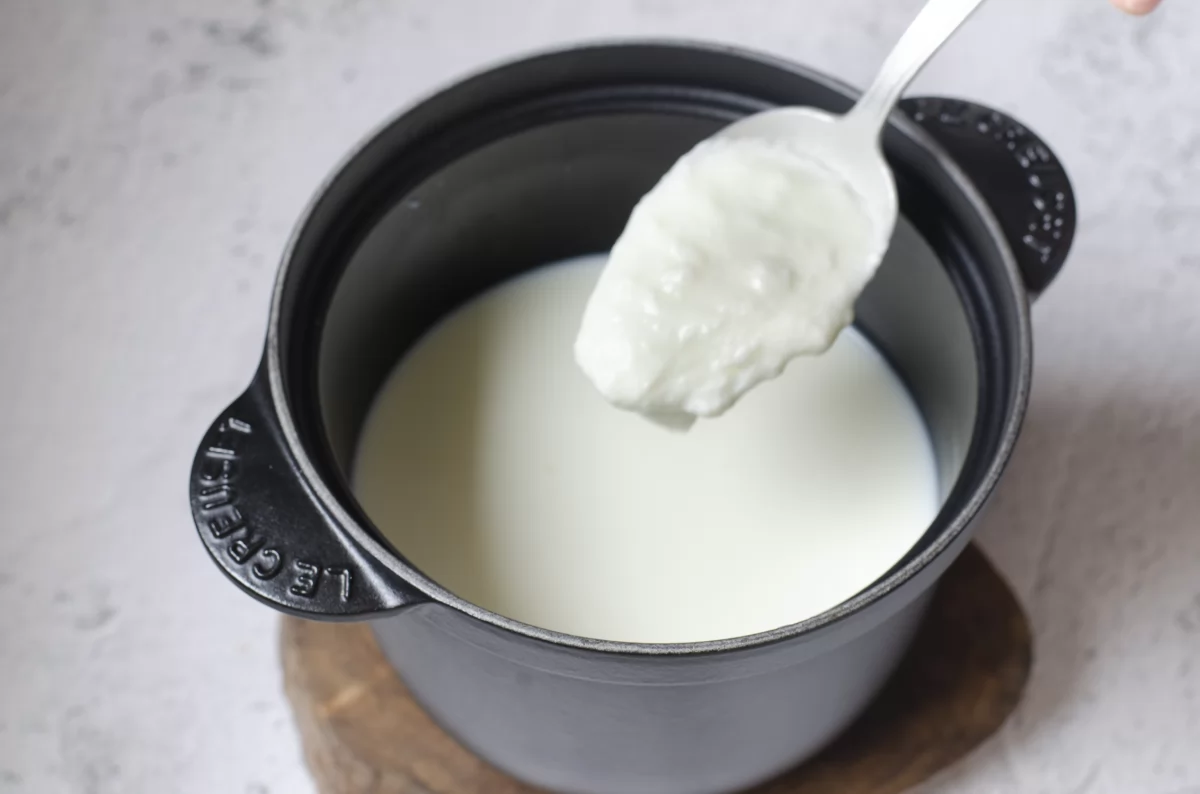
If the milk heats up more and exceeds 40 °C, we will wait for the temperature to drop to the indicated temperature. When we have the milk at the reference temperature, we add 1 natural yogurt. We can do this directly or previously dissolved in a little milk, to facilitate its total dissolution.
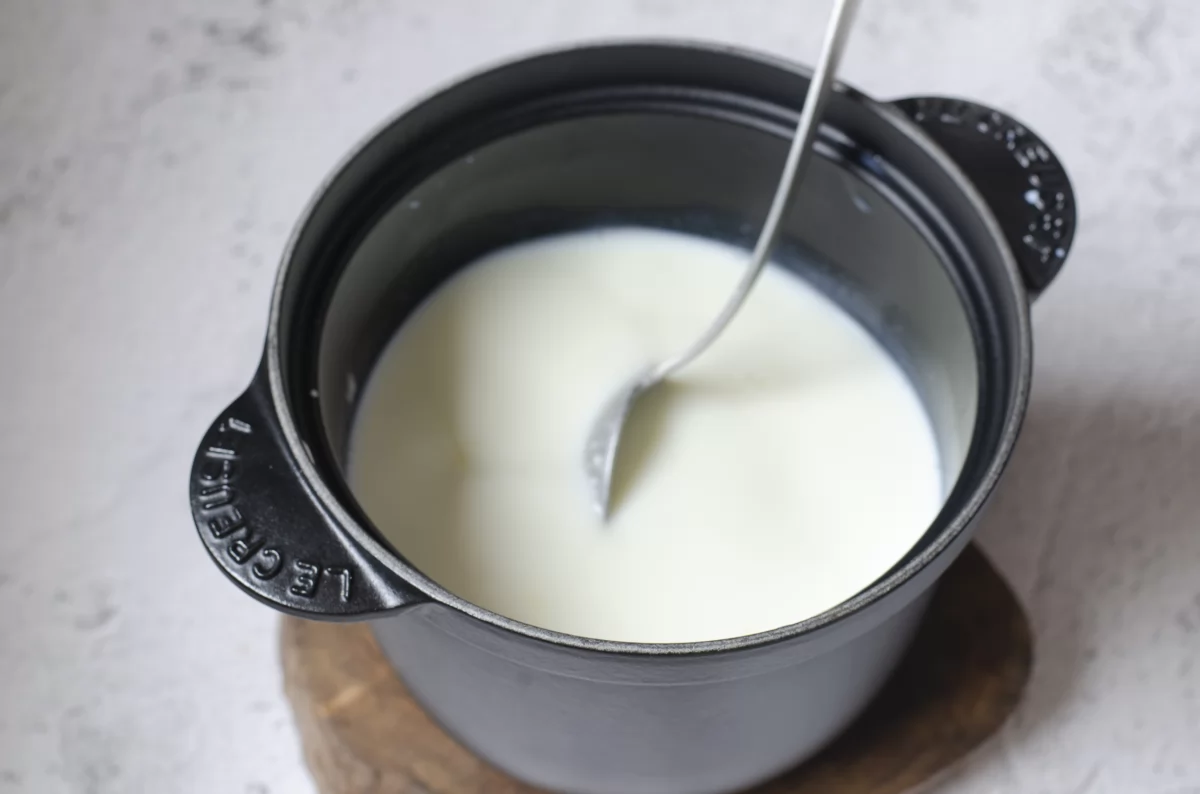
Mix the yogurt well with the previously warm milk, until it is well integrated.
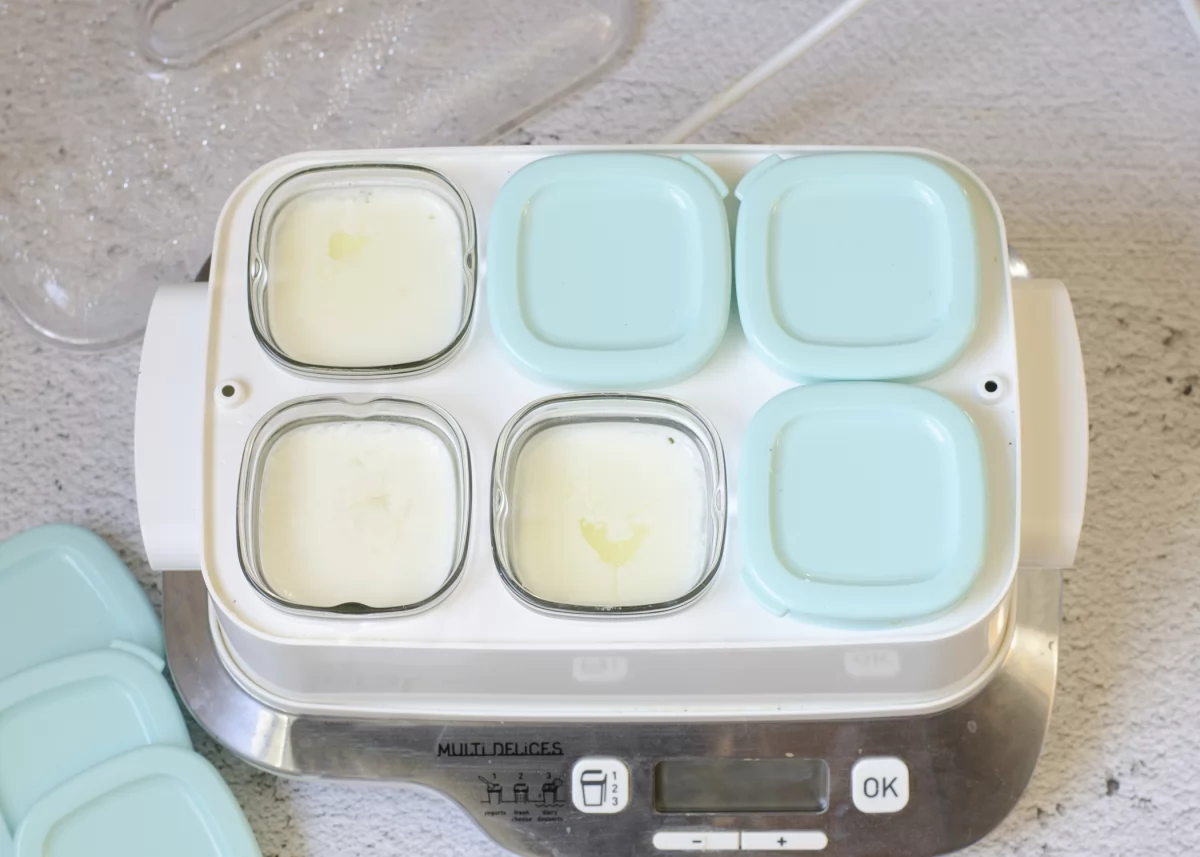
And once we have everything well mixed and integrated, we pour it into the glasses of the yogurt maker.
If we don’t have a yogurt maker, we can use glass or ceramic jars, and we can even choose to prepare yogurt in a large 1-liter container instead of making individual yogurts.
Regardless of the recipients chosen, during fermentation they must remain uncovered.
If we are not going to use a yogurt maker to ferment our yogurts, which has an outer lid, and we want to protect them, we can use gauze to cover the yogurts, but do not close them hermetically.
We program the yogurt maker and, as in this case as we use a yogurt as a culture, the fermentation time will be 8 hours.
However, if after 8 hours the yogurt is still not ready, we can leave them a little longer, although if we spend too much time they will taste sour.
In yogurt, like any other ferment, both time and excess temperature will favor fermentation and if we overdo it, the result will be a more acidic yogurt.


-
- Heat the milk until it reaches 40 °C
-
- Add a natural yogurt that will serve as a culture
-
- Mix the yogurt well with the milk.
-
- Pour the mixture of milk with the ferment in the glasses of the yogurt maker or the chosen container
-
- We program the yogurt maker at a time of 8 hours
-
- After the fermentation time, we keep the yogurts for 3 hours in the fridge
-
- We consume homemade yogurts within a week

Homemade yogurt recipe
Ingredients
- 1 Liter Whole cow's milk
- 1 Natural yogurt
Instructions
- We prepare the ingredients of the recipe. We put 1 liter of milk in a saucepan. We bring it closer to the fire and let it reach 40 ºC.

- If the milk heats up more and exceeds 40 °C, we will wait for the temperature to drop to the indicated temperature. When we have the milk at the reference temperature, we add 1 natural yogurt. We can do this directly or previously dissolved in a little milk, to facilitate its total dissolution.

- Mix the yogurt well with the previously warm milk, until it is well integrated.

- And once we have everything well mixed and integrated, we pour it into the glasses of the yogurt maker. If we don't have a yogurt maker, we can use glass or ceramic jars, and we can even choose to prepare yogurt in a large 1-liter container instead of making individual yogurts. Regardless of the recipients chosen, during fermentation they must remain uncovered. If we are not going to use a yogurt maker to ferment our yogurts, which has an outer lid, and we want to protect them, we can use gauze to cover the yogurts, but do not close them hermetically.

- We program the yogurt maker and, as in this case as we use a yogurt as a culture, the fermentation time will be 8 hours. However, if after 8 hours the yogurt is still not ready, we can leave them a little longer, although if we spend too much time they will taste sour. In yogurt, like any other ferment, both time and excess temperature will favor fermentation and if we overdo it, the result will be a more acidic yogurt.

- Once the incubation or fermentation time has passed, we check that the yogurts are curdled, although they will finish settling in the fridge where they will acquire a more compact texture. After fermentation, some yogurts may even have a little whey on top, which is normal. We keep the yoghurts in the fridge for a minimum of 3 hours before consuming them, so that they acquire a little more consistency. We will observe that, once made and as the days go by, the yoghurts will release whey because, although not at the same speed, the yoghurt will continue to ferment.

- After 3 hours in the fridge, our homemade yogurts will already have the right consistency for consumption. They can be kept in perfect condition in the fridge for up to a week after making them.

